Wednesday, August 8, 2012

Equestrian Decor

Despite our terrifying horseback riding trip in Colorado circa 1996 (trust us), we've always been a fan of horses.  Apparently the design world is, too.  Lately we've seen them popping up in various ways-- and we love the look:


We took a trip to the Brooklyn HomeGoods this week and stumbled across this little gem...on sale for $8! I'm not sure where he'll end up, and I'll most likely change out the frame, but we loved that it was a more modern take on this look.


 Tempted to add some equestrian into your decor?  We think these options would look great in just about any space:


This Jonathan Adler horse head lamp comes in white or black.  We spot a similar lamp in one of the images above.  It's got a hefty price tag, though...we'd love to see it as a DIY.

As always, Anthropologie delivers with an unexpected, lovely take on this trend:


LOVE these Pottery Barn horse hooks.  We like how they're used here, but also think they'd look great in a man's closet to hang ties.


Our last two finds are from Z Gallerie-- we like the idea of the driftwood horse on a tiered console table or on top of kitchen cabinets (also...we've seen it in person and it doesn't look nearly as massive or as dog-like).  The art is SO dreamy and is neutral enough to work in any space.

Equestrian decor might be trendy, but we love it.  What about you...are you as smitten as we are?

Friday, August 3, 2012

Julie's Dining Room: Accessorizing a Console Table

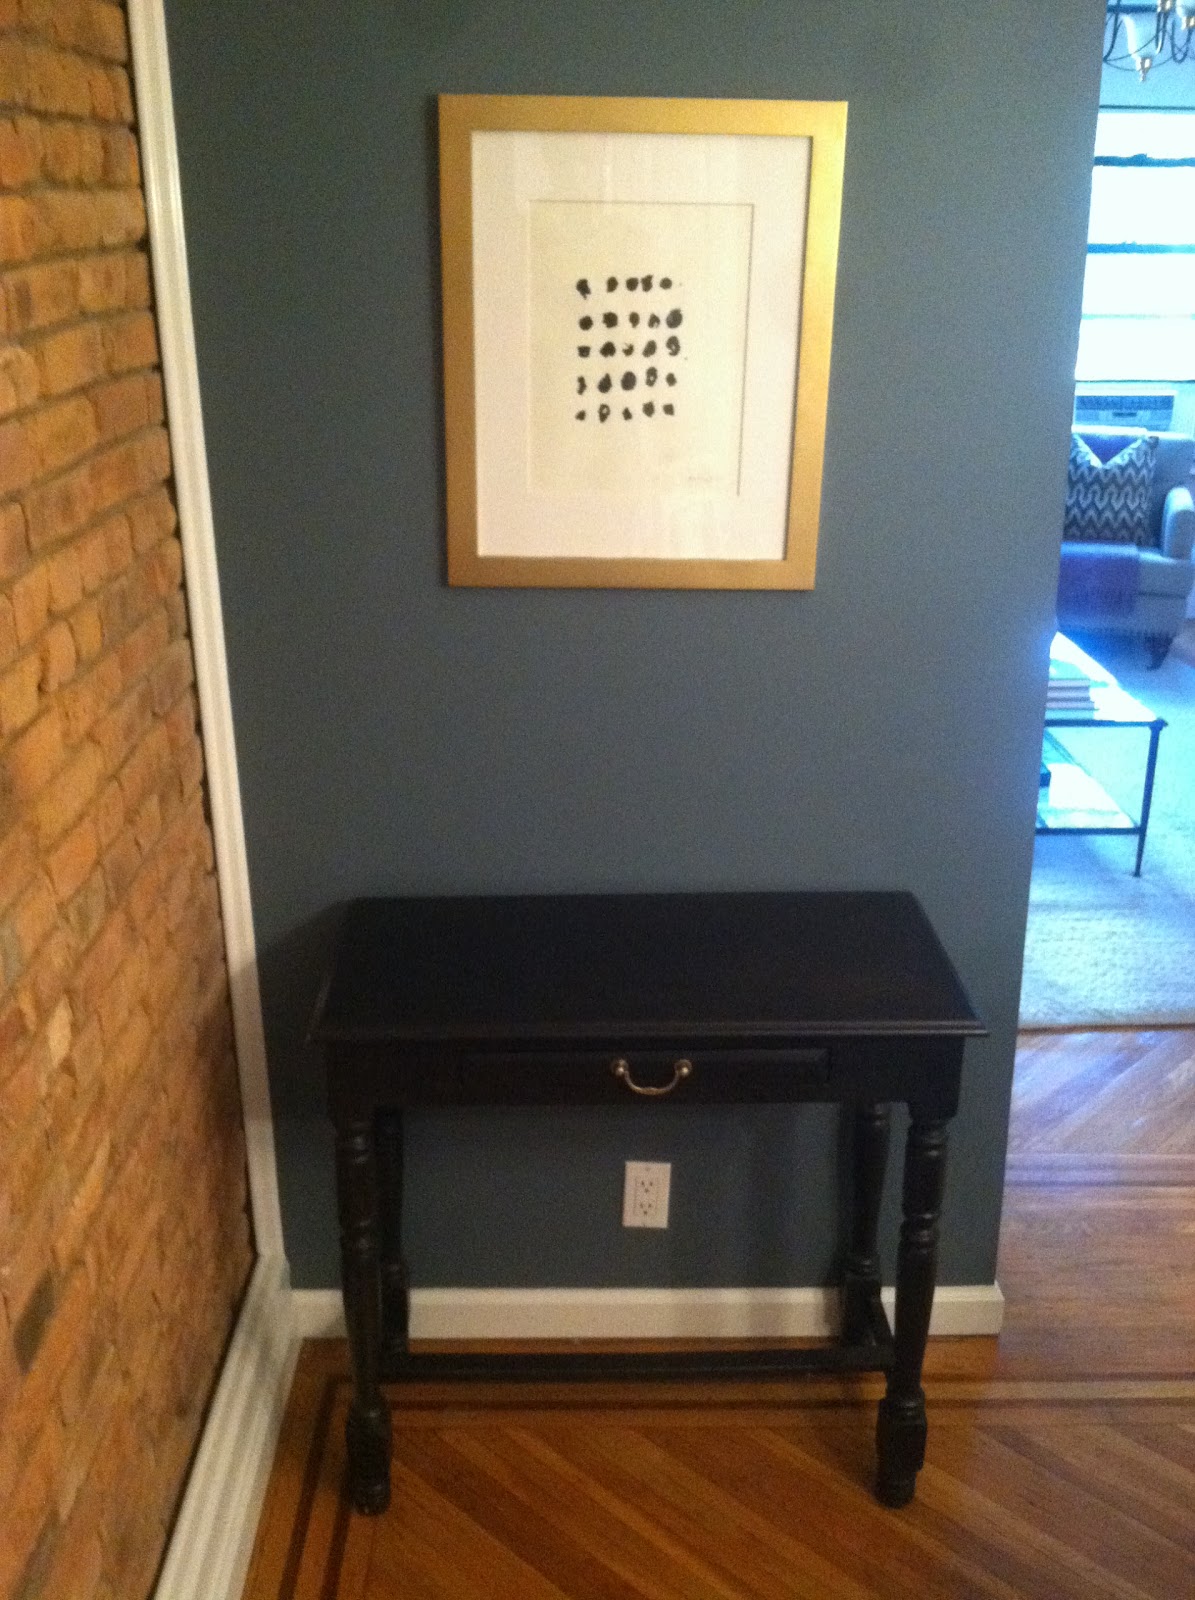
We have a sad, little console table that sits underneath one of the DIY circle prints in our dining room.  I hadn't given this table much thought since putting it in the dining room, but I knew that I needed to do something with it to help bring together the look of the room.


Even though mine was neglected, console tables are a great way to bring color and unexpected accessories into any room or hallway.

via Alice Lane Home


via DecorPad 

via DecorPad

via DecorPad
I wanted to accessorize the table using things we already had.  And by "things we already had" I mean Clay threatened divorce if I spent any more money on accessories.

Because Brooklyn isn't the greenest city in the world, I like to have plants in each of the rooms in our apartment.  Because I find most house plants ugly and hard to keep alive, preserved boxwoods are my favorite "plant" to use in decor.  Not only do they look great and bring a pop of green/life into any room, they also don't need to be watered.  Just mist them whenever they start to look a little sad.


I picked up this one at HomeGoods.  I think it is this one from Restoration Hardware, only I paid $50 instead of $145.  I practically threw it in my cart when I saw it.  If you don't have luck finding a preserved boxwood at a store like HomeGoods, the Restoration Hardware boxwoods are great quality and well-priced.

The frame holds the poem that Clay's dad wrote to him on our wedding day.  I love framing notes, drawings, and cards from our loved ones.  The gold stones say "believe," "hope," and "peace" on the underside and were given to me by my mom before the big move to NYC.  I stacked the books to bring more color into the room.


I love the look of stools/benches layered underneath console tables.  I picked up a really beat up stool from our local thrift store for $15, spray painted it gold, painted the feet black, and added a cream linen to the seat cushion.  Eventually I think I'll paint it a more exciting color, but it works for now.


Since throwing this together I've also added a small floral acrylic painting that I picked up at the flea market. Other console table ideas you could try are leaning art or a mirror against the wall, accessorizing a pretty tray, displaying a collection, or adding an interesting lamp (or pair of lamps).  Regardless of how you decide to accessorize your console table, I think it's always a good rule of thumb to display something natural and add some height.  Of the images above, which do you like best?  Any other tips for accessorizing console tables?

Wednesday, August 1, 2012

Julie's Dining Room: DIY Circle Art

I've been on the hunt for art for my dining room ever since we moved in.  Even though Sarah is the gifted artist of the family, when I stumbled across this image, I knew that abstract circle art was something I could recreate for the space.

Home of Meredith Heron via Marcus Design Blog
I picked up some black acrylic paint and some cheap frames and got to work.  Here's what I came up with:


The painting process was super easy-- because there wasn't really a process.  I just tried to make the circles irregular and uneven...I didn't want anything too perfect.  Because I didn't want the two prints to be identical, I repeated the process but made much smaller circles for the second print.  The frames are from Target-- I spray painted them with Rustoleum's Metallic Finish (which does not look nearly as yellow as it does in iPhone pictures).


Even though we are looking forward to growing our "real" art collection, I'm happy with how they turned out and with how little I had to spend on them!

Wednesday, July 25, 2012

Julie's Bathroom: Do You

The worst parts about renting are the things you absolutely cannot change, like flooring, tile, cabinets, countertops, etc.  This fact is something I am reminded of every day when I enter my bathroom and am confronted with pink and blue tile and floors.  I painted the walls a deep, gray-blue to try to trick my eye, added some nice accessories like shelves and canisters, and hung some art to try to distract from the heinous color scheme.

The "art" that I hung is actually part of a Rifle Paper Co. calendar.  I liked that it pulled in the pink of the tile/floor but also had some black and army green to add a bit more style.  Lately, I've felt that the art was a little too "sweet" for my liking, so wanted to add something to make it a little more quirky.


I decided that I was going to use my typewriter alphabet stamps (similar ones here) to add some kind of phrase to the art.  I thought about something in Spanish as a nod to our heritage or a short song lyric, but couldn't come up with something I loved.  When I mentioned the idea to Sarah, she replied: "do you."

I wasn't sure if she was giving me her seal of approval on changing the art or if she was suggesting that I actually use that phrase on the art.  "Do you" is  a commonly used phrase between Sarah and me.  We use this expression as a way of saying "be yourself," "do your thing," etc.  Embarrassingly enough, it is also a commonly used phrase between cast members of the Jersey Shore.

I busted out the stamps and got to work-- I didn't have a black ink pad, so I just used a sharpie.  I tried it out a few times on notebook paper to make sure I got the placement and amount of ink right, and then moved on to the actual print.


I love that it adds a little funny and a little quirk to the otherwise very 80s bathroom.  Now all we need are appropriate Jersey Shore nicknames.  And husbands with blow outs.

Monday, July 23, 2012

Julie's Apartment: DIY Black and White Striped Nook Reveal

Happy Monday!  We've been delinquent bloggers lately, because this little black and white striped cutie joined the family in June.  Pictures of his nursery coming soon!


As promised, here are the "after" photos of the striped nook.  I added the brass bicycle wheel mirror, which I bought from CB2 ages ago, and the cabinet is the Ikea Hemnes shoe cabinet.  I love that when I walk into the house I have somewhere to stash my shoes, so they don't wind up on the dining room floor.  We use the top drawer for keys, iPod headphones, sunglasses, etc.  The carrot painting was done by my grandma.


I love that this little corner of our apartment feels "done."  We've also been making some changes in my living room and master bedroom...more to come on that soon!


Saturday, June 30, 2012

Golden Birthdays

This isn't a design post, but we've both celebrated our golden birthdays this year (Sarah turned 30 on the 30th and I turned 27 on the 27th) AND we celebrated the most important birthday of all on June 2...Sarah's baby boy! Because we've spent the past month celebrating, we thought we'd share some great birthday gifts and ideas with all of you.

For my birthday, Clay got me 27 gifts.  Apparently this is a tradition in his family/town and who am I to argue with tradition?  To be honest, opening was 27 presents was the most fun time EVER.  Here are all of the gifts, lined up in perfect, golden order:


The box included some great golden birthday gift ideas, like this bangle from Kate Spade, inscribed with "as good as gold" on the inside.  Coincidentally, Sarah got me the exact same bangle (great minds), and gave hers to me first so she wins out on this one.


Also from Kate Spade, this stationery with a gold initial and black and white stripes.  And we all know how I feel about black and white stripes.


I also got these sandals, which are a STEAL and are so cute (they run about a half size big, by the way).


And this book, which I can't wait to read during our summer getaway.  And it's pretty, to boot!


The gifts I got from Clay reminded us of the "forty in a box" featured on You Are My Fave.


How fun would this be to give (or receive)? We're definitely stealing this idea for future birthdays.

Sarah and I both made each other cake on our respective birthdays.  Sarah topped hers with edible gold star sprinkles like these.  We both used our mom's frosting recipe, which is too good not to share.  The pre-made frosting that you can buy in tubs in the grocery store...poison.  Especially after you taste this.


Mom's Perfect Frosting:
1 pound powdered sugar
1 stick butter
1 teaspoon vanilla
1/8 teaspoon salt
3-4 tablespoons milk

Cream 1/3 of the sugar with butter and salt in a large bowl.  Blend vanilla, two tablespoons milk, and remaining sugar into mixture.  Gradually stir remaining milk into frosting until desired spreading consistency is reached.  For more generous frosting, increase ingredients by 1/4. For chocolate frosting, add 1/2 cup cocoa.

Other (golden) birthday ideas we love?

Ombre balloons.

Via

Cake pops.


Sparkler candles.


And champagne. Lots of it (and please rim your glasses with sprinkles! It's only appropriate).


Happy Birthday to all of our fellow summer birthday friends! Do you have any favorite birthday traditions or great gift/party ideas?

Thursday, June 28, 2012

Julie's Apartment: DIY Black and White Striped Nook

My apartment doesn't have much of an entryway, but it does have a random nook in between our front door, kitchen, and master bedroom that has been dead space ever since we moved in.


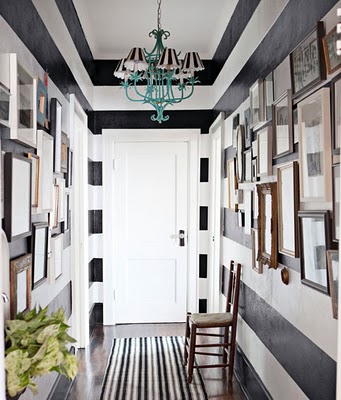
It's a pretty tight space, with no outlet for any lighting, so I knew that I wanted to do something with the space that brought in a little bit of style and also gave us some extra storage.  I have always loved the look of bold black and white stripes in decor, so thought this might be the perfect spot to try some out. 


When I stumbled across this project by Jenny Komenda from Little Green Notebook, I thought Japanese washi tape might be the perfect way to get the look of stripes without risking our security deposit.  Because I'm a child and cannot delay gratification, I trekked around NYC until I found a store that sold black washi tape (for those interested, Kinokinuya Bookstore on 6th Avenue has a great selection). For those of you capable of waiting on standard shipping, Happy Tape is the place to go.  Once I got the tape, it was time to measure.  Basically, Sarah and I decided on how many stripes we wanted, how far apart we wanted them, and then got to measuring.  


After that, it was time to tape.  This tape is really easy to work with, and peels right off and sticks back on if you make any mistakes.  I stretched the tape longer than I needed it to go, and then used an X-Acto knife to get straight edges.


The above shot was so flattering we just couldn't help but put it in this post.  You're welcome.  After LOTS of taping and cutting...we ran out of tape.  


Clearly, our math skills need a little tweaking...my head is bowed in shame.  The next day, we ran out for more tape and then finished up.  Since then, we've added an embroidered print from HomeGoods and an Ikea Hemnes shoe cabinet, which we got for a steal off of Craigslist and has been such great storage system for my shoes.  "After" pictures coming soon.

We love the look of the stripes, and that such a simple project has turned this nook into a functional, pretty space.  
Related Posts Plugin for WordPress, Blogger...
 
site design by designer blogs